Welding Hardness Test
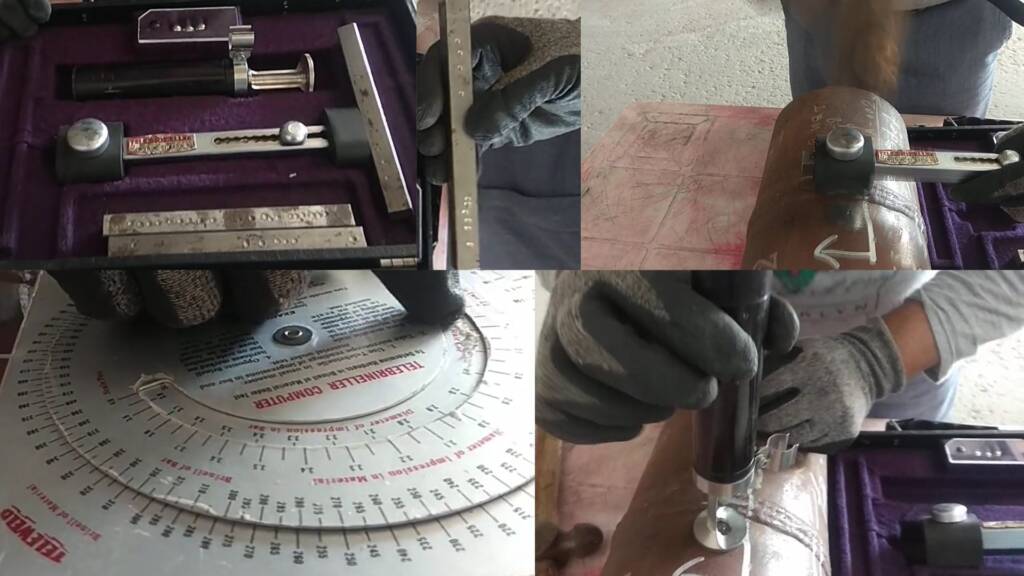
Welding Hardness test is a type of Non Destructive test to ensure the integrity of the weld joints. That is performed as per ISO (International Organization for Standardization) standards ISO 9015 and 15614 Specification. But these both standards are not the same, both are used for different purposes. ISO 9015 has two parts, where Part 1 covers hardness testing of arc-welded joints. And Part 2 covers micro-hardness testing of welded joints. And ISO 22826 (destructive test) covers laser and electron beam narrow weld joints hardness testing . Weld hardness testing follows the standards ISO 9015 and 15614 Specification but some other quality standards also follow as per customer requirements.
There are many types of tests performed to ensure the pipe integrity like Hdyro test, Holiday test, continuity test, visual inspection etc
Why is a welding hardness test required?
Basically the reason behind the welding hardness test is that if the welding piece and welding material are not the same specification, in some cases it will be different from weld piece material. During the welding process high heat was generated and might have changed the metal properties to its surroundings. At the weld joint of both end parts could be crack, delamination that makes joints brittle. If brittle joints occur surrounding metal weeks. This area is categorized as the high heat affected zone.
Hardness testing shall be carried out during welding procedure qualification on cross sectional. Nowadays hardness testing shall be carried out by portable digital hardness testers. Poldi hardness testers shall not be permitted. Contractor or consultant shall produce documentary evidence/calibration certificate to the Inspector and take approval of the hardness testing equipment.
Calculate Heat Affected Zone
By using metallographic analysis experimentally, we can determine the width and depth of the fusion zone and heat affected zone(HAZ). But it is also possible to calculate the theoretical temperature field also with the help of Rosenthal´s approach. This is a straightforward method but Rosenthal´s equations are based upon a point or line heat source. We can use a distributed heat source (double ellipsoidal), with Green function method combined with numerical integration over time for calculation of temperature fields and by the result received, it might be possible to calculate the fusion zone (FZ) and heat affected zone HAZ parameters.
By using metallographic study it is possible to experimentally decide the width and depth of the fusion zone and heat affected zone. But I want to calculate it or determine it from theoretical calculations of the temperature field. As we know, using Rosenthal´s approach is a simple. But Rosenthal ́s equations are depended upon point or line heat source and we use a spread heat source (double ellipsoidal), with the Green function method addition with numerical integration over time to calculate temperature fields. Once I got this, how can I calculate the fusion zone (FZ) and heat affected zone (HAZ) parameters?
Procedure of Welding Hardness test
A hardness test is commonly carried out by pressing a particular dimensioned loaded object (indenter) into the surface of the test piece which you are testing, and measuring the impact of the indenter. The hardness is determined by measuring the depth of indenter penetration by measuring the size of the impression left by an indenter equipment.
Types of Hardness test for welding
There are several techniques used for hardness tests, but all are based on the principle of standard load apply with the help of indebted and measure the impact of the indentation nowadays portable type hardness testing machines also use. Most common types of hardness testers are.
- Vicker’s Diamond test
- Brinell test
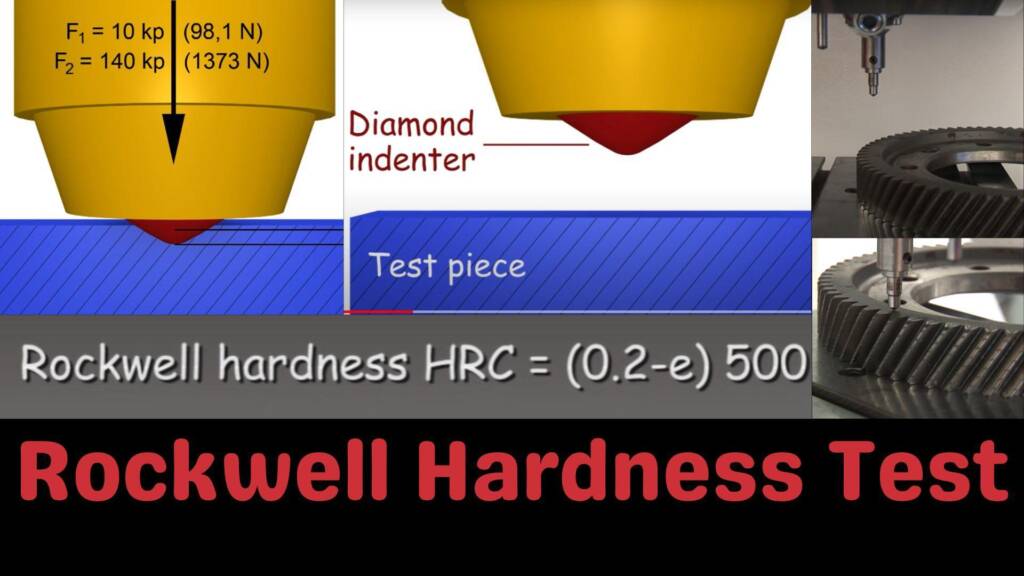
- Rockwell test
- Knoop Hardness Testing
- Hardness Testing with Clemex
Vicker’s Diamond test
Vicker’s Diamond test uses a square pyramid shaped diamond indenter with load up to 1 kg to 100kg. Impression of indentation of vicker is smaller than the brinell test so it can also be for a smaller impression area as well. and possible to carry out the survey surrounding the weld joints. Surface should be flat and perpendicular to the indenter for small impressions and should have at least 300 grit finishes or better than that.
Brinell test
It is a most common type of hardness testing method in which an indenter is pressed into the metal test piece using a defined load for a defined amount of time. Generally the Brinell test uses a 3 ton load. In the Brinell tests indenter is typically 1 centimeter, hardened steel ball. However other indenters, like .5 centimeter hardened steel ball and the 1centimeter tungsten carbide ball are also used. The two diagonals of the indentation or impact created by the indentor are measured and converted into a Brinell Hardness Number (BHN).
Rockwell test
It is also a most common type of hardness testing technique in which a small load is put in to seat the penetrator into the test material and hold it in place. Once the penetrator has settled into the test materials, remove the load and the Rockwell hardness number is read directly by the dial and recorded the same then after removing the minor load. 3.175 and 1.59 millimeter hard steel ball penetrators are used for softer metals and for harder test materials use cone-shaped diamond penetrators.
Knoop Hardness Testing
The Knoop hardness test is also used as micro hardness test method as an alternative to the Vickers hardness test. It can be used for universal or micro hardness testing. It is used to identify cracking in brittle materials, as well as to facilitate the hardness testing of thin layers. Where Vickers test measure indentation length on the vertical and horizontal axes and get averaged but the Knoop method only uses on the long axis take measurement and then by using a chart convert to a Knoop hardness number.
Hardness Testing with Clemex
Clemex hardness testing is a fully Automatic Microhardness test machine. It is the most practical, strong true Automatic Micro Hardness Tester nowadays. That can make the depth measurement or hardness profile automatic so achieved throughput and accuracy. This system transportation is easy to shift location and the accuracy is less than 1 micro. Due to auto function it indents on the test piece then make auto-focus and measure the indent and draw the hardness graph and based on the cut off value calculates the case depth value.


